Here's what you need to run google ads with SeekMake Instant Quoting Plugin
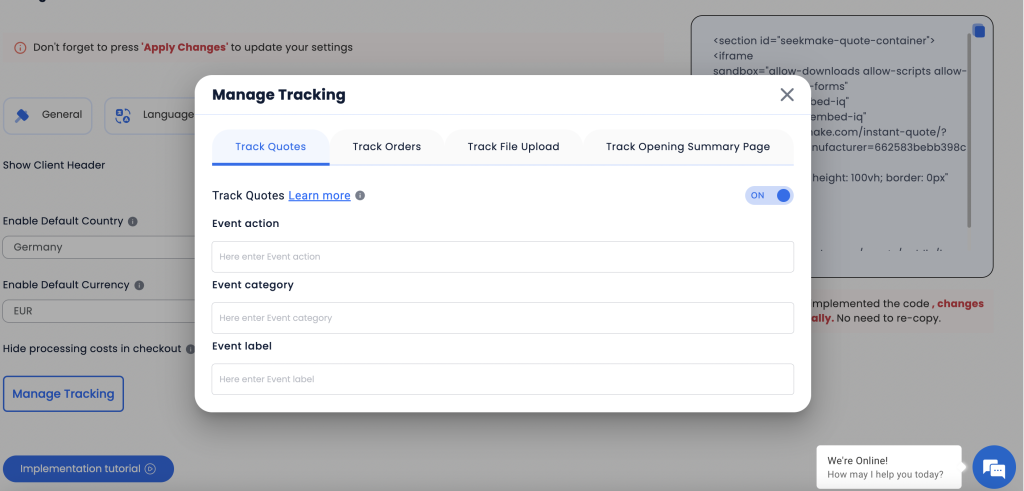
Example Data to Add to your Tracking system on SeekMake :
File Upload event
{
event: “file_upload”,
gtm: {uniqueEventId: 4, start: 1732623221403},
value: 1,
currency: “USD”,
transaction_id: “N/A”,
email: “N/A”
}
Summary Page event
{
event: “SM_3DPrint_Summary_Page”,
gtm: {uniqueEventId: 5, start: 1732623221403},
value: 1,
currency: “INR”,
transaction_id: “N/A”,
email: “N/A”
}
Manual quote event
{
event: “SM_3DPrint_Manual_Quote”,
gtm: {uniqueEventId: 6, start: 1732623382559},
value: “0”,
currency: “INR”,
transaction_id: 352,
email: “N/A”
}
Paid order event
{
event: “SM_3DPrint_Order”,
gtm: {uniqueEventId: 6, start: 1732623221403},
value: “1358.69”,
currency: “EUR”,
transaction_id: 351,
email: “N/A”
}
Running Google ADS for your SeekMake Quoting Plugin on Your Website
- Create a Google Analytics (Universal Analytics or GA4) and Google Tag Manager account if you don’t have one.
-
- Go to Google Tag Manager to set up your tags and triggers.
-
- First, you need to set up a tag of your GA Universal Analytics or GA4 to connect it with your GTM:
-
- Go to Tags
-
- Click “New”
-
- Tag configuration
-
- If you have the Universal Analytics account:
-
- Choose Universal Analytics
-
- Track type -> Page View
-
- Add new Variable
-
- Paste your tracking ID (UA-xxxxxxxxx-x)
-
- If you have the Universal Analytics account:
-
- If you have the GA4 account:
-
- Choose “GA4: Configuration”
-
- Paste your Measurement ID (G-xxxxxxxxxx)
-
- If you have the GA4 account:
-
- First, you need to set up a tag of your GA Universal Analytics or GA4 to connect it with your GTM:
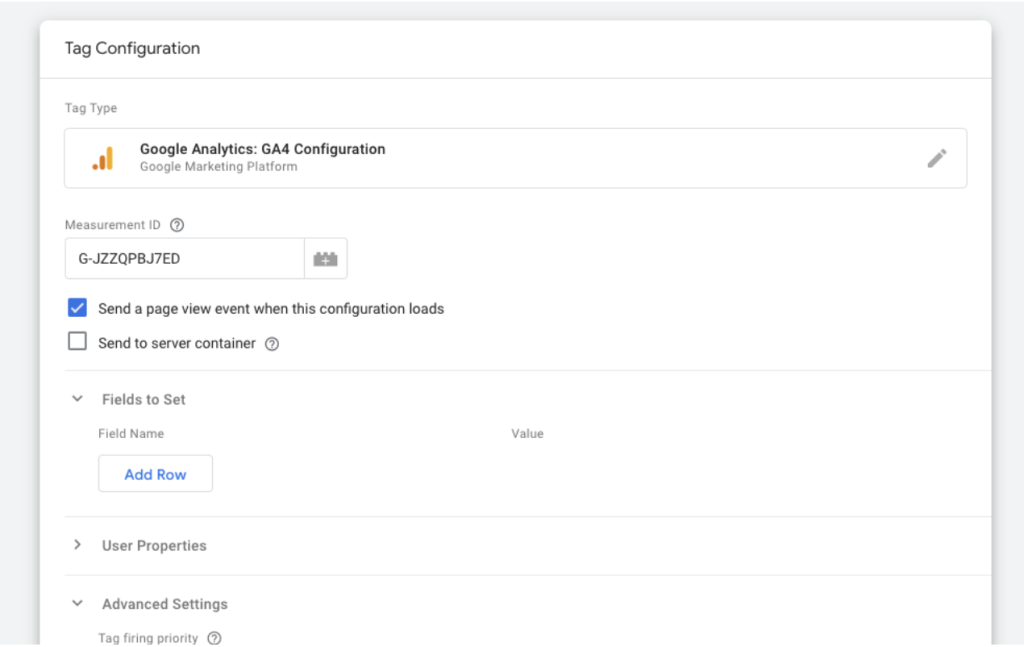
4. Then add a trigger, select All Pages – Page view
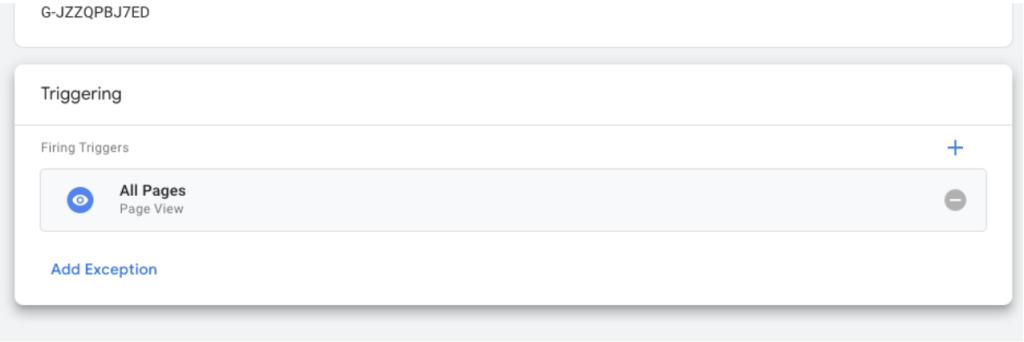
5. Setup your Event
-
- Again go to Tags
-
- Click “New” -> Tag configuration
-
- Select GA Universal Analytics or GA4
-
- Set Track type to “Event”
-
- Specify Event Tracking Parameters
-
- Select the GA variable you created when adding your GA tag.
-
- Click the trigger section, then click + icon, and then hit it once again in a new window to create a new trigger.
-
- Select “All elements”
-
- Select “Some Clicks” and choose “Click ID” (if there’s no Click ID option then click “Choose built-in variable” and select “Click ID”) -> equals
-
- Find your element/button. Inspect the element with your browser tools and find id=”some_id_example”
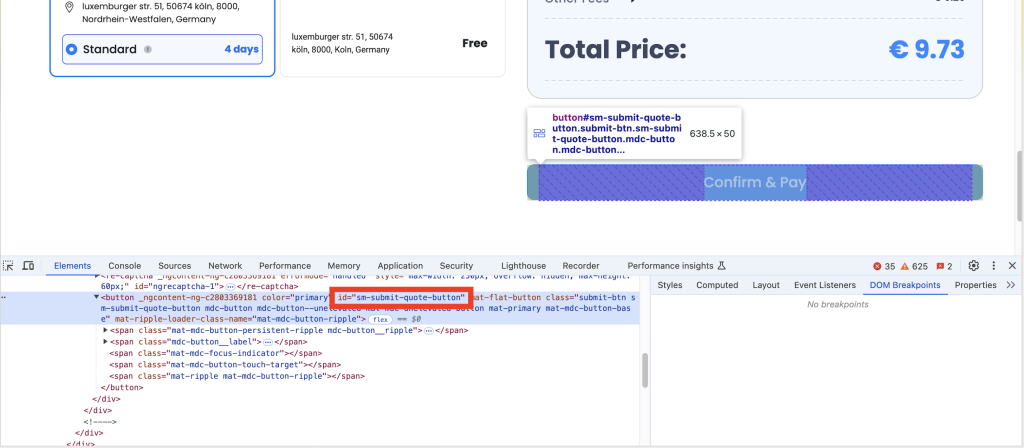
Then paste it in the trigger configuration
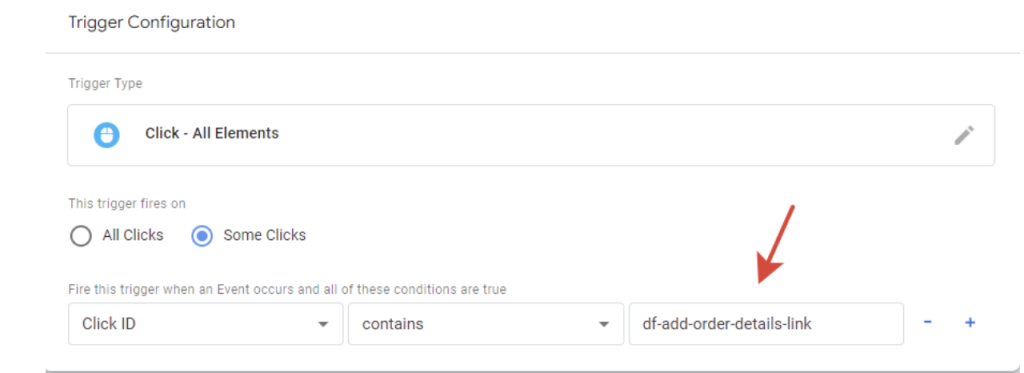
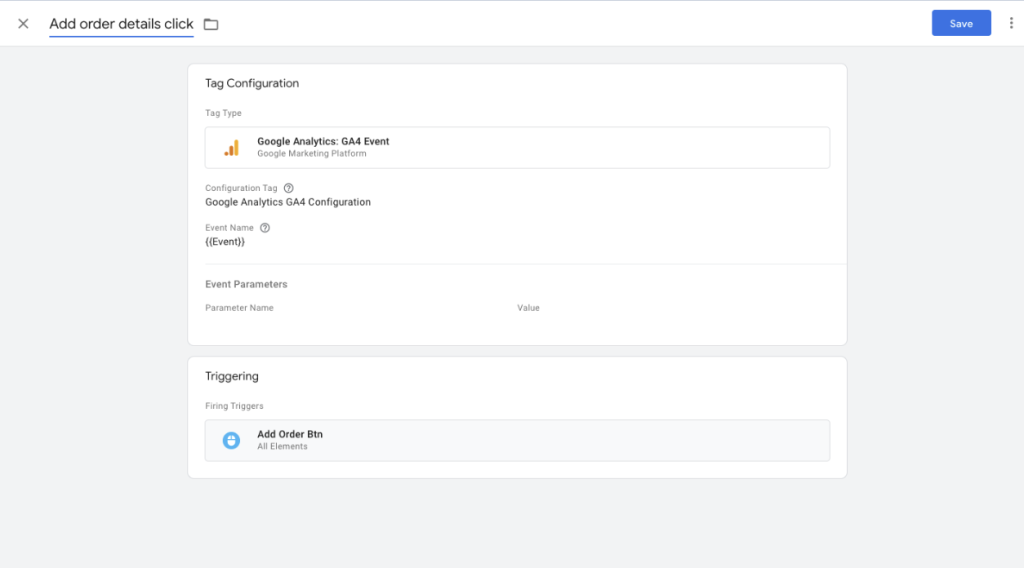
12. Save it
6. Debug it with Google Tag Assistant
-
- Click Preview
-
- Specify a link where you’re going to track the Event
-
- Proceed to this page and hit the element/button you’re tracking
-
- Get back to Tag Assistant and make sure tags have fired
-
- Click Submit to publish your GTM.


